Post-production processes
Step 1: Logging Rushes and Creating an Edit Decision List

ensuring that the footage matched the 1920x1080 size of my sequence.

Once
in Premier Pro I reviewed each variation of each shot I had taken, once
I'd found my favourite variation from each shot I renamed them in
accordance to their name on the shot list I created in the
pre-production stage e.g shot 1, shot 2, shot 3 etc. I then deleted the
unusable variants from the project, this still meant I could re-import
them if I changed my mind.
This saved time as I did not have to rename shots that I would of never used.
Producing and Reviewing an Offline Edit
Offline editing is part of the post-production process of film making production in which raw footage is copied and edited, without affecting the camera original film stock or video tape. Creating an offline edit allowed me to understand how the final film would look and helped me to make decisions on what footage to completely remove and which footage should be trimmed down.
 |
| During the Offline Edit the Razor tool (I) is the most useful as it allows the user to quickly cut and delete clips to a precise length. |

While creating my offline edit I referred to my shot list, script and storyboard so that my my final result reflected the story I'd created in the planning stage, without this coordination I could become confused on where to place clips. Any footage I didn't have I replaced with a placeholder title sequence that I created in Premiere Pro until it had been filmed. However during the editing phase I found that when I put the sequences together they didn't make sense, thus did not tell the story in the desired way. This meant I had to make some variation in the edits so to remove any issues that had been created in the planning phase.
Below shows an example of when I had to change my edit and how it varied from the storyboard and script:

 |
| This example above shows that I had to change elements of my edit due to technical restraints as I found I was unable to insert actors into the tank models given the time I have had to complete the project. |
Once I had completed my offline edit my film was well structured in terms of the story and I was ready to move onto creating and applying the relevant visual effects, motion graphics, transitions, color correction/grading and adding audio to create the online edit.

Step 3: Applying appropriate Visual Effects and Transitions
In order to create smooth transitions between clips I used Premiere Pro's default transition effects. I then dragged the effect onto the end of the clip I wanted the transition to occur on.

 |
| In the image above the Zoom video transition has been applied to the footage, this means that when this video ends it will transition to the next clip by zooming into it. |
Inserting 3D Tanks:
This stage required me to match the shooting conditions of the scene e.g Camera position and Lighting to match the scene properties in 3DSmax.
Camera Mapping: In order to place 3D objects into a scene I had to go through the process of camera mapping, camera mapping means recreating the position of the camera in the 3D software in order for perspective to be correct.

Creating the lighting: To light my scene in 3DSmax I used the V-ray sunlight tool to create a source of light, however this light was over exposed and did not reflect the lighting in my video footage. In order to match the lighting this is the process I had to go through.

Render Setup: Once I had finished setting up the scene I was ready to render. To ensure that I had the most realistic looking results I adjusted the following render settings.
AE composition: The final stage of this effect was compositing the rendered tank image over the original footage in Adobe After Effects. I imported the tanks beauty and shadow pass into the project and dragged them into my composition, after this I key framed their scale for the tank to grow in size as it the lightning strikes the table.
 |
| Here I have 'solo'd' the beauty pass layer to show that layer only |
 |
| This is the beauty pass when solo'd. |
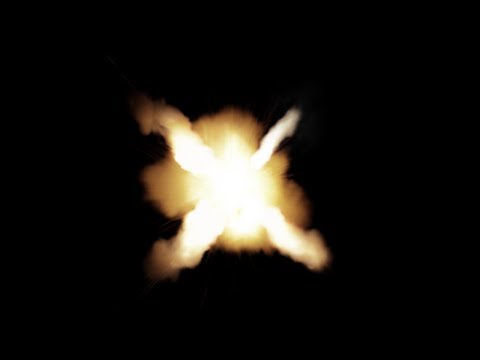
Add Lightning Effect:
First I created a solid colour layer that I placed at the top of the composition, I then applied the lightning effect, this turned my solid layer to resemble lightning however I still had to adjust some parameters of the effect, such as positioning, colour and speed I also applied a glow effect to emphasise the effect.

Creating Muzzle Flashes:
In order to create the flashes from the muzzle of the tanks barrel I had to import 2D video assets from Video Copilots action essentials pack that contains hundreds of stock footage of explosions, fire and smoke that have been preprepared for composition, meaning when overlaid on footage the background is removed.
The image below is an example of the stock footage used.

Once I'd finished creating the effects in After Effects I then exported these clips to mov format at 24 FPS, to match the FPS of my Premiere Pro sequence. I then imported these edited clips into Premiere Pro and replaced the placeholder videos with the new edits.
Colour Grading
The final stage of the editing process before I rendered my project was the colour grading phase, in order to colour grade I used 'Magic Bullet Looks' an industry standard colour grading software that allowed me to accurately create a 'look' that would correspond with the tone/theme of the video.
In order to create the look I wanted I first applied one of the software's default presets that matched the theme of the video and then used this as a base to make any adjustments to fit my footage.
In order to create the look I wanted I first applied one of the software's default presets that matched the theme of the video and then used this as a base to make any adjustments to fit my footage.

Step 4: Linking Audio to Visuals and applying audio effects
For the base audio track of this production I chose to use the track 'adrenaline' from the game Call of Duty Black Ops 2 as it is fast paced and upbeat, grabbing the audiences attention, it also suits well with my theme and genre. To maximize the impact of the track on the audience I ensured that I cut my visuals to match the beat of the music.
Voice Over:
During the pre-production phase I planned for a voice over to accompany my visuals as the video uses advert format in the beginning scenes. In order to record the voice over I found a professional voice actor who was willing to record the script. As my actor was in Russia we used Teamspeak to talk and so I could listen to how he sounded and then direct him, to ensure the voice corresponded with the theme/genre of the video. Once I had the voice overs I imported them into Premiere Pro and dragged them into the timeline ensuring they corresponded with the correct video clip by referring to my script, as seen below:
Cam Direction
After painting the model the actor calls his friend (Actor 2) over in a really OTT style, MS of friend walking over sped up and then slowed down as he sits to emphasise the action (camera follows his movement)
|
V/O.
RALLY YOUR FRIENDS FOR THE ULTIMATE BATTLE
|

Once I'd linked the audio to the clip I had to sometime cut the audio so it came in at the correct time, this meant using the ripple edit tool to cut off the beginning and endings of the audio clips.

Sound Effects:
In the end half of the video I required sound effects to match with the visuals. In order to create realistic and high quality SFX I used my Rode Video Mic-R connected to my Canon 750D to record the desired sounds. If I was unable to make an effect I downloaded royalty free sound effects from online sites, or recorded sound from video games. I then imported these sound effects into Premiere Pro and using my script I aligned the sound effects with the appropriate visuals as I had planned in the script.
 |
| The image above shows the project finished, with all effects applied. |
No comments:
Post a Comment